You want juicy, well-flavored boneless chicken breast without stressing over a recipe. Seasoning is the secret you can master in minutes.
This guide shows clear, repeatable steps so your chicken tastes great all week. You’ll learn simple measurements, tools, and visual cues that guarantee consistent results.
How to Season Boneless Chicken Breast for Flavorful Weeknight Meals
Seasoning boneless chicken breast means building flavor layers: base salt, aromatics, and a final binder so spices stick. The goal is balanced, even coverage and predictable flavor.
You’ll finish knowing how long to rest the seasoning and which small tools make the job fast.
Step-By-Step Guide
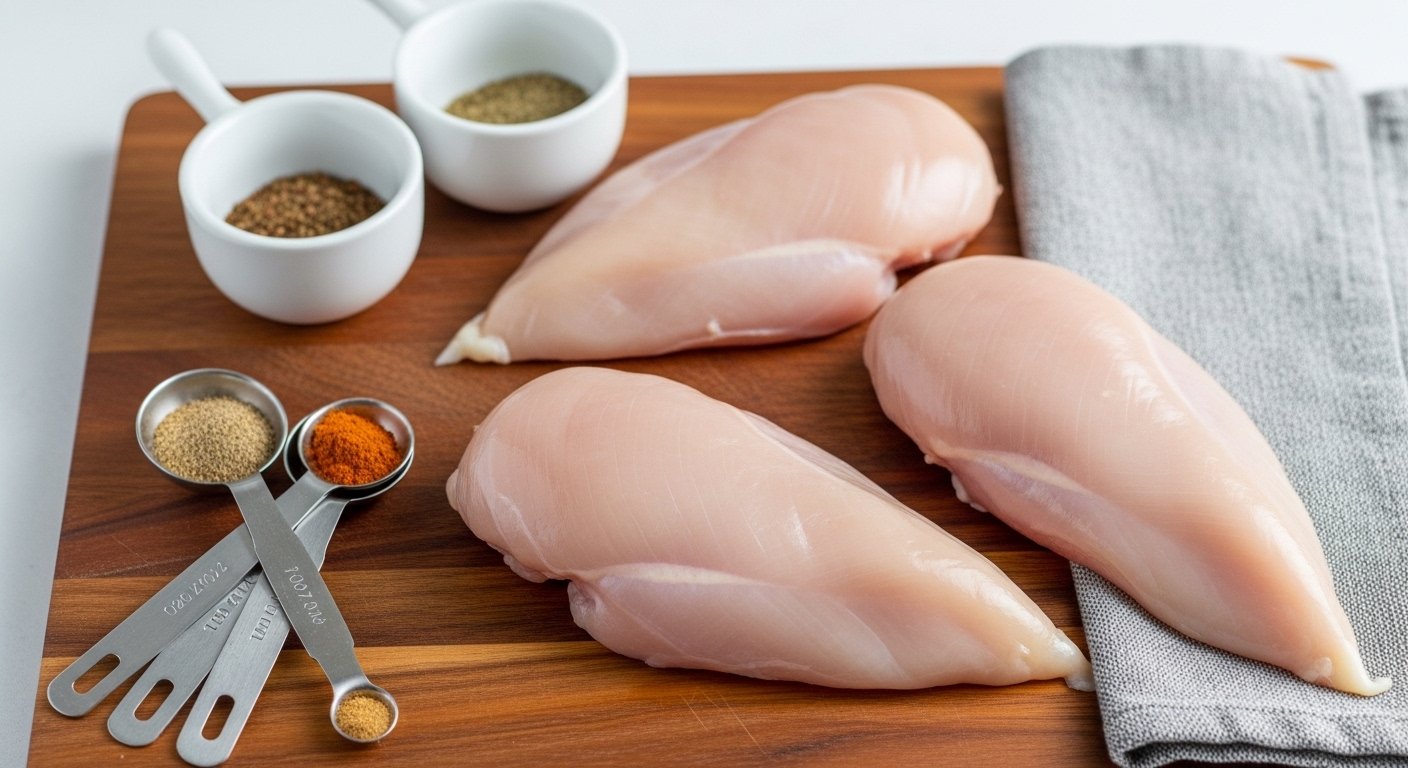
1. Even the Thickness
Pat each breast dry with paper towels. If one side is thicker, pound gently to an even ¾–1-inch thickness so seasoning contacts meat evenly and cooks predictably. This prevents dry edges and uneven flavor.
Use a meat mallet for quick flattening. A couple of light taps across the surface is enough. Meat Tenderizer Mallet helps you get consistent thickness fast.
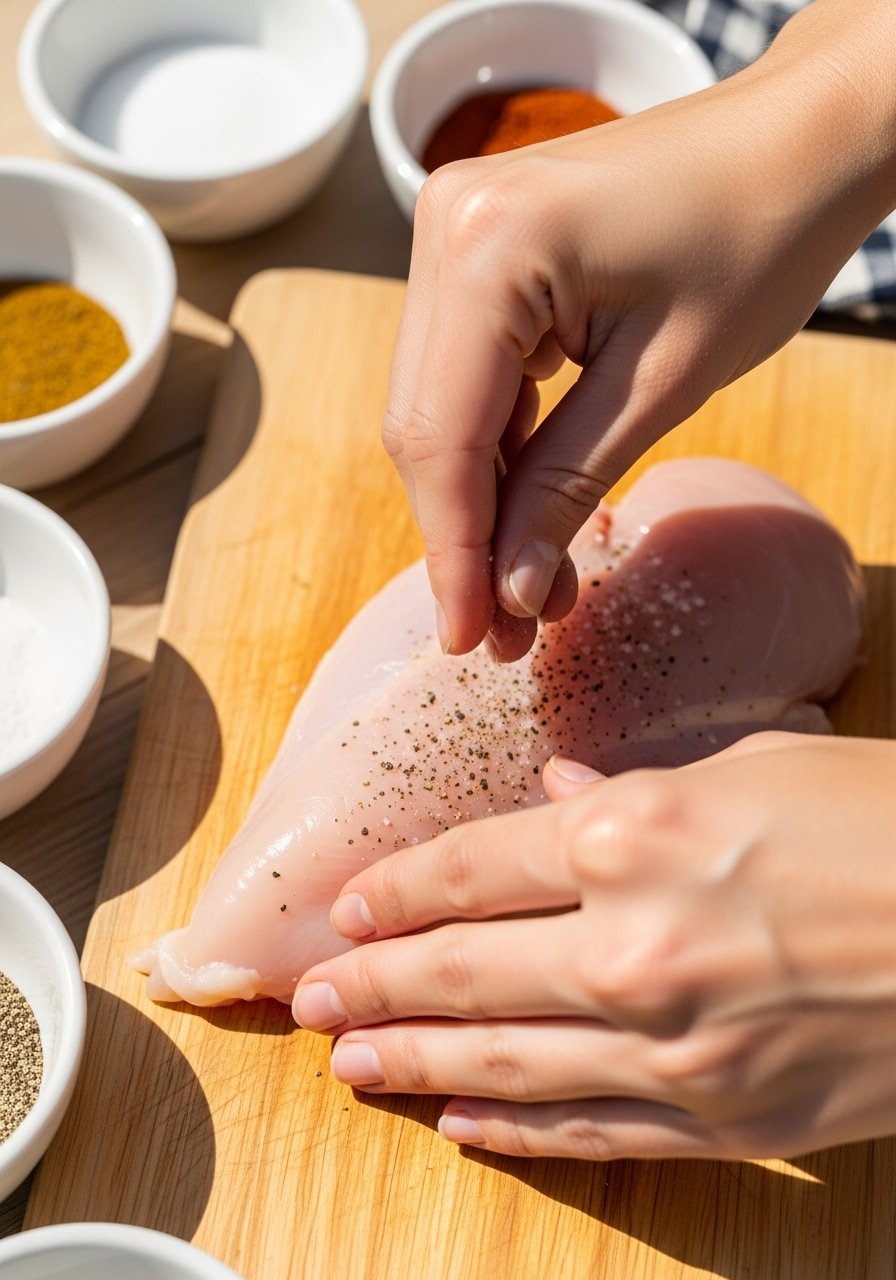
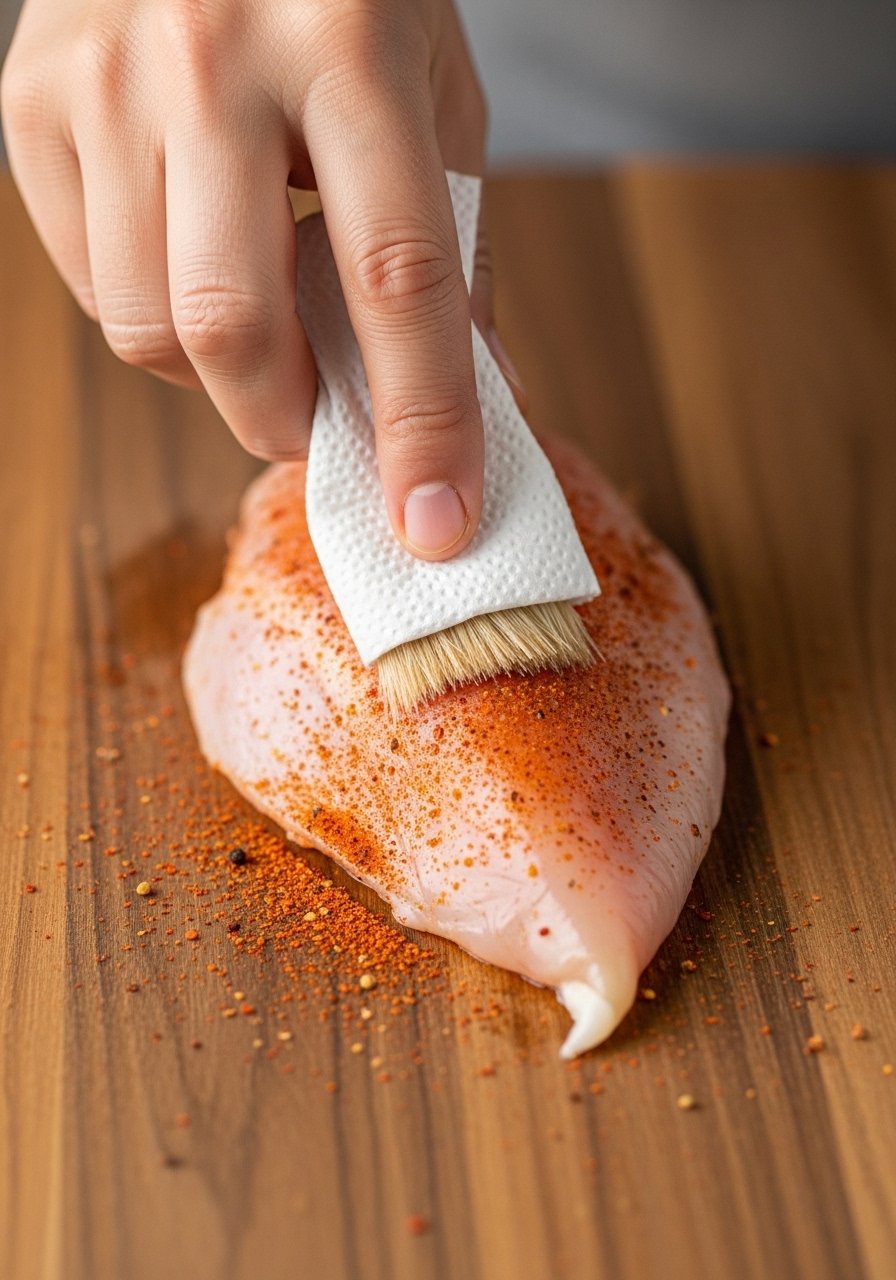
2. Pat Dry, Then Oil Lightly
Drying the surface removes excess moisture so salt and spices adhere. Brush a thin layer (about 1 teaspoon) of olive oil or neutral oil on each breast—just enough to make the surface tacky.
Oil carries fat-soluble flavors and promotes even browning when you cook. Use a silicone brush for control. Silicone Basting Brush is easy to clean and precise.
3. Apply the Salt-First Rule
Sprinkle kosher salt first: about 1/2–3/4 teaspoon kosher salt per 6–8 oz breast (adjust for salt type). Salt seasons deeply and draws flavors into the meat when allowed to rest briefly.
Follow with 1/4–1/2 teaspoon freshly ground black pepper per breast. Salt first improves overall balance and prevents an over-salty surface.
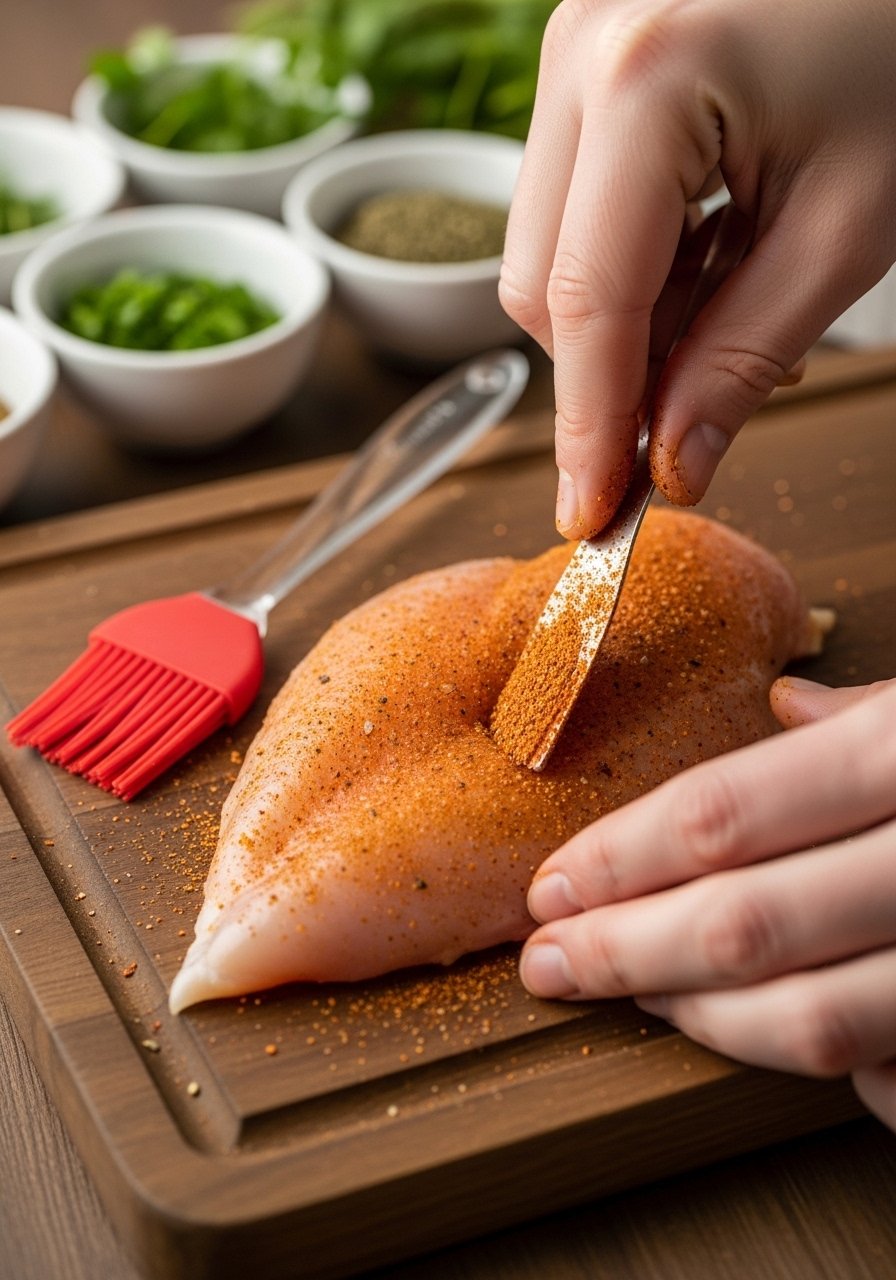
4. Add Aromatics and a Binding Layer
Layer simple dry spices next: 1/4 teaspoon garlic powder and 1/4 teaspoon onion powder per breast are reliable. For a binder, press a thin smear of oil or mustard onto the breast before applying dry rub so spices cling evenly.
A herbed paste (1 tbsp olive oil + 1 tsp chopped herbs + lemon zest) gives fresh lift. Measuring spoons and a small bowl keep mixes accurate. Stainless Measuring Spoons and a Small Mixing Bowl make mixing tidy.
5. Rest Briefly, Then Check
Let seasoned breasts rest 15–30 minutes at room temperature for the salt to do its work and spices to adhere. You’ll see the surface become slightly tacky and take on a uniform color—that’s your cue it’s ready.
If you need deeper flavor, refrigerate for up to 2 hours in a covered container. Bring back to room temp before cooking for even results.
Best Dry Rubs and Simple Blends
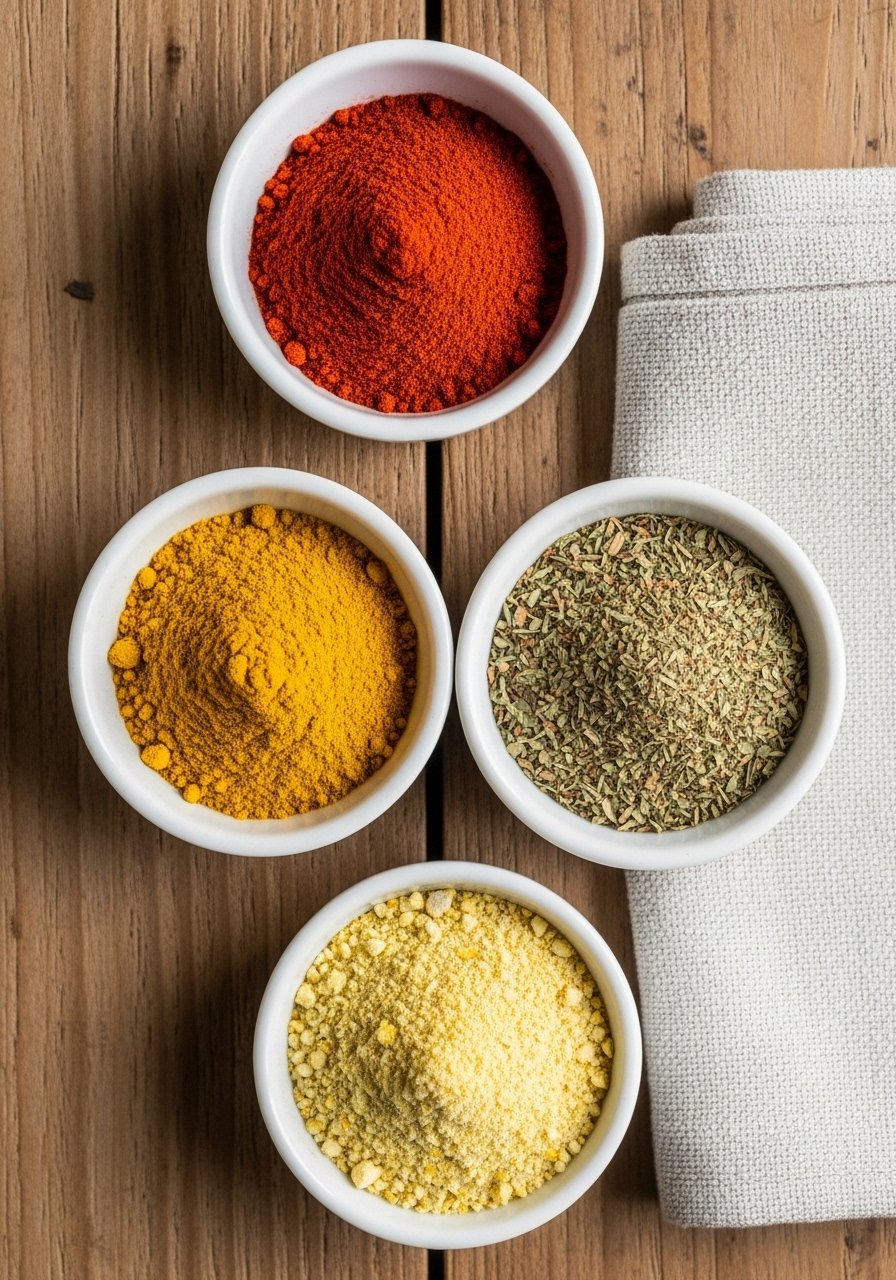
- Classic All-Purpose: 1 tsp smoked paprika, 1/2 tsp garlic powder, 1/2 tsp onion powder, 1/2 tsp kosher salt, 1/4 tsp black pepper — mild, versatile.
- Lemon-Herb: 1 tsp lemon zest, 1 tsp dried oregano, 1/2 tsp kosher salt, pinch black pepper — bright and fresh.
- Smoky BBQ: 1 tsp smoked paprika, 1/2 tsp brown sugar, 1/2 tsp chili powder, 1/2 tsp salt — great for bold flavor.
- Simple Aromatic: 1/2 tsp ground cumin, 1/2 tsp coriander, 1/2 tsp salt — warm, earthy notes.
Measure blends in small bowls and press onto the oiled breast for even coverage. These blends let you vary flavor without changing your cooking routine.
Common Mistakes And Quick Fixes
- Too Much Salt Up Front: If it tastes salty after a brief rest, wipe lightly and re-season with milder herbs. Use measured amounts next time.
- Uneven Coverage: Work in thin layers—oil, salt, then spices—and press gently so spices stick uniformly.
- Seasoning Falls Off When Cooking: Use a small binder (oil, mustard, or yogurt) under the rub to hold spices in place.
These fixes are fast and keep weeknight cooking simple.
Tools That Make Seasoning Easier
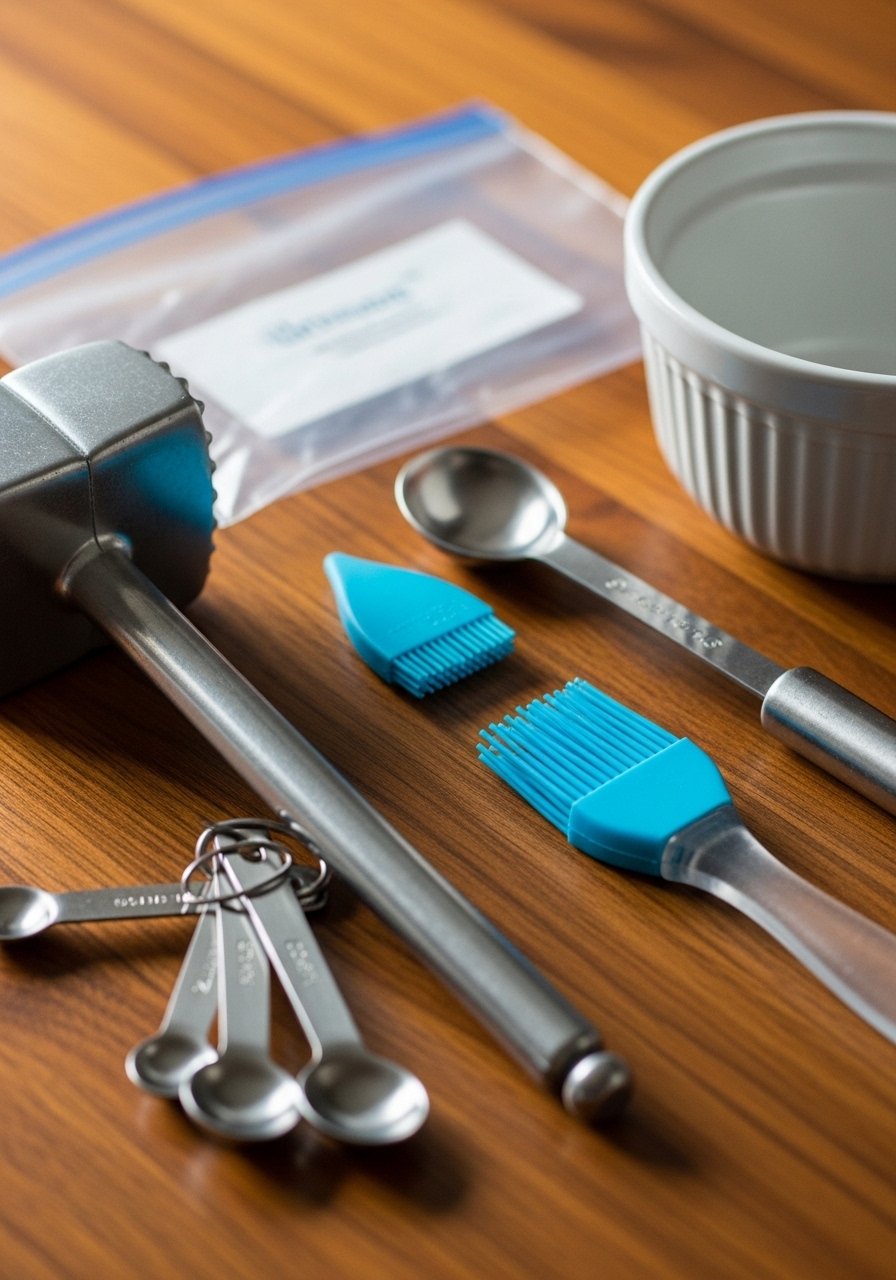
- Meat mallet for even thickness: Meat Tenderizer Mallet
- Measuring spoons for consistent seasoning: Stainless Measuring Spoons
- Small mixing bowl for blends: Small Mixing Bowl
- Silicone brush for oil/binder application: Silicone Basting Brush
These inexpensive tools speed the process and ensure repeatable results each night.
Final Thoughts
Seasoning boneless chicken breast is a quick skill that transforms weeknight meals. Follow the salt-first rule, use a light binder, and rest briefly for best results.
Start with the simple blends here, adjust to taste, and the same handful of steps will deliver reliable, flavorful chicken every time.
Leave a Reply